

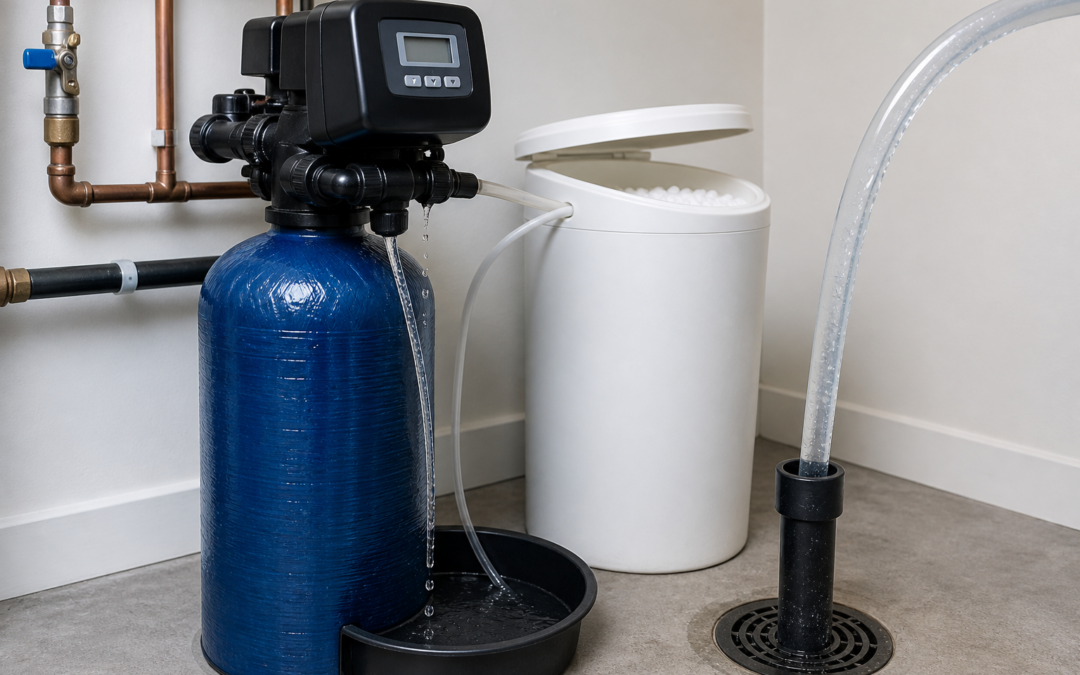
Water moving through a softener’s drain line during regeneration is expected. Water leaking onto the floor, running down the tank, or escaping anywhere outside the intended drain path is not. A leak may appear only during regeneration because the control valve activates flow paths that stay quiet while the unit is supplying softened water.
Possible sources include the drain-line connection, brine tank or brine tubing, valve head and its seals, bypass or plumbing connections, and a damaged tank or fitting. The wet spot on the floor does not identify the failed part by itself because water can travel along a hose, pipe, or tank before it drips. The safest next step is to limit damage, note exactly when and where the water appears, and arrange an inspection without forcing another cycle.
Why the Leak May Appear Only During Regeneration
During normal service, incoming water passes through the mineral tank and continues into the home. Regeneration changes what the system is doing. Depending on the equipment and programmed cycle, the valve may send water through a backwash, draw brine, rinse the resin, and refill the brine tank. Water also leaves through the regeneration drain line.
Those changing routes can expose a problem that remains dry between cycles. A connection may seep only when drain flow begins. A brine tank may rise too high only during refill. A worn valve component may leak when the internal position changes. A loose bypass or plumbing joint may drip more visibly during a shift in pressure or flow.
The sequence and duration vary by system. Do not assume that every softener follows the same order or that a certain minute identifies one part. Note what the display shows, what sound you hear, and where the first moisture appears, but do not start another regeneration solely to recreate the leak.
Limit Water Damage Before Inspecting the Unit
If water is spreading quickly, protect people and the building before trying to identify the component. Keep away from wet receptacles, extension cords, appliances, and electrical panels. Do not stand in water to unplug equipment or operate a control.
A clearly labeled, accessible softener bypass may isolate the treatment unit while leaving water available to the home. Use it only if you know which control is the bypass and can reach it without crossing water or forcing a stuck valve. If the leak is uncontrolled, the bypass is unclear, or water continues after bypassing, use the home’s main water shutoff if it is safe to reach and request help.
Unplugging the softener may stop a motor from advancing, but it does not necessarily remove water pressure or stop an active leak. Do not rely on power disconnection as the only shutoff.
Once flow is controlled, move dry belongings away from the area if you can do so safely. Use towels or a wet vacuum only when there is no electrical hazard and the water is ordinary supply or discharge water rather than sewage. Do not dismantle the valve head, tubing, or tanks to search for the source.
Record the First Wet Point, Not Just the Puddle
Water often follows the outside of a tank or hose and collects at the lowest point. Look from a dry, safe position with a flashlight and trace upward from the drip. Useful observations include:
- Whether water first appears at the control valve, drain-line fitting, brine tube, bypass, plumbing connector, tank seam, or under the brine tank.
- Whether the leak begins when drain flow starts, during brine movement, near refill, or after the system returns to service.
- Whether the water is a slow bead, an intermittent drip, a steady stream, or an overflow from the top of a tank.
- Whether the drain hose is moving, kinked, displaced, flattened, or visibly backed up.
- Whether water is inside the containment pan and where the first drop lands.
- Whether the brine tank level looks unusually high compared with its normal state.
- Whether the display shows an error or the system seems stuck in one stage.
- Whether anyone recently moved the unit, added salt, serviced a nearby pipe, or changed the drain route.
Take a short video or several photos if you can do so without approaching wet electrical equipment. Include the full softener and the first wet connection, not only the floor. Do not wipe every surface before documenting the path unless immediate cleanup is necessary to prevent damage.
Normal Drain Discharge Can Still Reveal a Drain-Line Problem
Regeneration intentionally sends water to an approved drain route. You may hear flow or see water pass through an air gap. That discharge should stay inside the drain tubing and receptor.
A wet area near the drain hose may involve a loose connection at the valve, a split or worn hose, a displaced end, a restricted route, or an air gap that cannot accept the flow cleanly. A kink or improper rise can also affect how the line drains. The visible symptom needs to be matched to the complete route rather than blamed on the closest fitting.
Do not cap, plug, pinch, clamp shut, or push the hose deeper into the drain as an emergency fix. The softener needs a working discharge path during regeneration, and defeating that path can redirect water or interfere with operation. Leave the route intact for inspection unless shutting off the home’s water is necessary to stop damage.
If you are unsure how much discharge is expected, the answer depends on system design, settings, water use, and local conditions. MicroPure’s explanation of water used during softener regeneration gives context, but exterior leakage is a separate fault that needs its own diagnosis.
Water at the Brine Tank Has Several Possible Paths
Water inside a brine tank is part of normal operation within the limits established for that system. Water spilling over the top, seeping from a crack, or collecting outside the tank is not the same thing as a normal refill.
An exterior brine-tank leak can involve the tank body, overflow fitting, brine line, float or safety assembly, refill control, or a drain condition that prevents the cycle from completing as intended. Salt can also hide the internal water level, so a tank that appears mostly full of salt may still hold more water than expected below the surface.
Do not reach into the tank, pull the float assembly, disconnect the brine tube, or probe hardened salt while the system is pressurized or cycling. Do not assume a salt bridge is the cause merely because the tank looks dry on top. Note whether water is coming over the rim, through an overflow connection, from a tube, or from beneath the tank.
The Control Head and Valve Connections Need a Close Inspection
The control head directs water through the regeneration stages. A leak at the top of the mineral tank may come from a drain fitting, injector cover, seal, valve body, threaded connection, or nearby plumbing. Water can spread across the top assembly and descend along the tank, making the source difficult to see from floor level.
Plastic fittings and valve parts can be damaged by overtightening. Do not put a wrench on a wet fitting or remove a cover while the unit is under pressure. A technician can depressurize the correct section, inspect the connection, identify whether a replaceable component is involved, and verify the repair through a controlled cycle.
A leak at the bypass or the home’s inlet and outlet plumbing may also become more obvious during regeneration even though that joint is not part of the drain system. Look for moisture around both the softener valve and the fixed plumbing connections. Do not force a stiff bypass handle in an attempt to stop a leak.
A Tank or Body Leak Changes the Repair Direction
Water coming through a visible crack, seam, or tank wall needs a different response from a loose external hose. Shut down the water supply to the affected equipment rather than trying to patch a pressurized vessel. Tape, adhesive, sealant, and temporary clamps are not reliable ways to judge or restore the integrity of a mineral or brine tank.
Confirm that the water is actually emerging through the body. Condensation, a leak higher on the valve, or a nearby plumbing drip can make an intact tank look cracked. Drying the exterior after the system is isolated and watching where moisture returns can help, but pressure testing and disassembly belong to a trained service provider.
Do Not Use Repeated Regeneration as a Leak Test
It may be tempting to start another cycle after the floor is dry. That can release more water before the area is ready and may increase damage. It can also move the valve away from the position that produced the original symptom, making the evidence harder to interpret.
Instead, preserve the time, display state, photos, and location of the first leak. Note whether the regeneration was scheduled or manually started and whether recent power loss or setting changes occurred. If you know the usual regeneration frequency, mention any unusual change to the service technician without reprogramming the unit.
Avoid these actions while the source is unknown:
- Do not start another manual regeneration.
- Do not plug or reroute the drain line.
- Do not remove the valve head, injector cover, seals, brine line, or float assembly.
- Do not tighten plastic fittings under pressure.
- Do not add chemicals, cleaners, lubricant, tape, or sealant to the water path.
- Do not change cycle times or refill settings to make the leak stop.
- Do not assume that adding or removing salt will repair an exterior leak.
What a Water Softener Service Visit Checks
A professional evaluation begins by confirming the source and isolating the equipment safely. The technician can compare the current settings with the system and household demand, examine the inlet, outlet, bypass, valve head, brine tube, drain line, air gap, brine tank, and mineral tank, and look for a route that explains the observed water.
Depending on the initial findings, a controlled test may check:
- Whether the system holds pressure without leaking in normal service.
- Which regeneration position activates the leak.
- Whether drain flow reaches the receptor without restriction or splash-back.
- Whether the brine level rises and falls as the specific equipment intends.
- Whether the valve advances through its programmed positions.
- Whether fittings, seals, tubing, or external connections remain dry after service.
- Whether the softener returns to service and produces the expected treated-water result.
The completed repair should be verified under the condition that originally exposed the fault, but only after the area, drain path, and equipment are ready for a controlled cycle. General water softener maintenance can reduce avoidable service problems, but maintenance does not substitute for repairing an active leak.
Repair or Replace the Leaking Component?
The answer depends on the exact source, condition, parts compatibility, service history, and overall performance. An accessible hose or external fitting problem can lead to a very different scope from a damaged valve body, compromised tank, obsolete control, or several failing components.
Age alone does not decide the outcome. A newer unit with a damaged vessel may need a larger correction, while an older system with an available external component may remain serviceable. Water quality, sizing, settings, recurring problems, and the condition of the resin and controls also matter.
Ask for the failed component and proposed work to be identified before approving a replacement. The explanation should distinguish the part that allowed water to escape from any separate issue affecting softening performance. A repair should stop the leak, preserve a safe drain route, and leave the system operating through a verified cycle.
Request Water Softener Repair in Albuquerque
If your water softener leaks only during regeneration, do not wait for the next automatic cycle to see whether it happens again. Isolate the unit with a clearly identified bypass when safe, or shut off the household supply for an uncontrolled leak. Keep away from wet electrical equipment and preserve photos of the first wet point.
Contact MicroPure Water Systems for water softener service in Albuquerque. The service team can identify whether the leak is associated with the drain route, brine system, valve head, bypass, plumbing connection, or tank and explain the repair direction before the unit is returned to service. Request service before another scheduled regeneration adds more water to the area.